The source code for this blog is available on GitHub.
7 minute read
Serverless OAuth with Discord & Next.js


const user: User = ifOnlyOAuthWasThisSimple(getToken());
Intro
Before we start, you can view the entire code hereSince the early days of man, OAuth has always been a struggle for new developers. In the stone age, we struggled with three things: starting fires, finding food, and figuring out why our OAuth scopes weren't working. Well explorer, look no further. Today, we'll be going through the process of connecting & deploying Discord's OAuth 2 API with Next.js and serverless now functions
The setup
Firstly, we're going to need to create a Next.js app. Feel free to skip this if you "have one that you made earlier."
Initialise project
yarn create next-app my-app
or, if you use npm (although use of yarn is strongly recommended)
npx create-next-app my-app
Add TypeScript
Next (no pun intended) we need to add and configure TypeScript.
cd my-app
touch tsconfig.json
yarn add typescript @types/node @types/react --dev
After this, you must rename every file in the project to end in .tsx for apps with JSX, and .ts for apps without.
At this point, we can start our app
If you open http://localhost:3000 in your browser you will see the welcome to Next.js page – if so, we can confirm that your Next.js setup is all working.
Adding dependencies
We're going to use jsonwebtoken for generating the users' tokens, cookie for serializing & parsing cookies and node-fetch for making our requests to the Discord API. Install them like this
yarn add node-fetch jsonwebtoken cookie && yarn add @types/node-fetch @types/jsonwebtoken @types/cookie --dev
After this, you're going to want to make a director under the pages called api. In this api folder, make a new file called oauth.ts. This is where we will add the code for OAuth.
The code
import { NextApiRequest, NextApiResponse } from "next";
import jwt from "jsonwebtoken";
import fetch from "node-fetch";
import cookie from "cookie";

// Create our type definition for a Discord User
interface DiscordUser {
  id: string;
  username: string;
  avatar: string;
  discriminator: string;
  public_flags: number;
  flags: number;
  locale: string;
  mfa_enabled: boolean;
  premium_type: number;
}

// Extract environment variables from process.env
// (we will come on to this later)
const {
  CLIENT_SECRET,
  CLIENT_ID,
  APP_URI,
  JWT_SECRET,
  COOKIE_NAME,
} = process.env;

// Create scopes, oauth querystring and URIs
const scope = ["identify"].join(" ");
const REDIRECT_URI = `${APP_URI}/api/oauth`;

const OAUTH_QS = new URLSearchParams({
  client_id: CLIENT_ID || "0",
  redirect_uri: REDIRECT_URI,
  response_type: "code",
  scope,
}).toString();

const OAUTH_URI = `https://discord.com/api/oauth2/authorize?${OAUTH_QS}`;

export default async (req: NextApiRequest, res: NextApiResponse) => {
  if (req.method !== "GET") return res.redirect("/");

  // Find the code or error from the request querystring
  const { code = null, error = null } = req.query;

  // If there is an error, redirect to the index page
  if (error) {
    return res.redirect("/?error=oauth");
  }

  // If there is no code, redirect to the OAuth URI
  if (!code || typeof code !== "string") return res.redirect(OAUTH_URI);

  const body = new URLSearchParams({
    client_id: CLIENT_ID!,
    client_secret: CLIENT_SECRET!,
    grant_type: "authorization_code",
    redirect_uri: REDIRECT_URI,
    code,
    scope,
  }).toString();

  // Request our access token, defaulting it to null if something goes wrong
  const { access_token = null } = await fetch(
    "https://discord.com/api/oauth2/token",
    {
      headers: { "Content-Type": "application/x-www-form-urlencoded" },
      method: "POST",
      body,
    }
  ).then((res) => res.json());

  // If the access token does not exist, return
  if (!access_token || typeof access_token !== "string") {
    return res.redirect(OAUTH_URI);
  }

  // Fetch this current user (uses the "identify" scope)
  const me: DiscordUser | { unauthorized: true } = await fetch(
    "http://discord.com/api/users/@me",
    {
      headers: { Authorization: `Bearer ${access_token}` },
    }
  ).then((res) => res.json());

  // If the id does not exist in the response body, request reauthorization
  if (!("id" in me)) {
    return res.redirect(OAUTH_URI);
  }

  // Sign a JWT with the payload of the current user...
  const token = jwt.sign(me, JWT_SECRET!, { expiresIn: "24h" });

  // ...and set it as a header
  res.setHeader(
    "Set-Cookie",
    cookie.serialize(COOKIE_NAME!, token, {
      httpOnly: true,
      secure: process.env.NODE_ENV !== "development",
      sameSite: "lax",
      path: "/",
    })
  );

  // Redirect back to the homepage
  res.redirect("/");
};
There's a bit more to do, but the main setup of our oauth endpoint is finished. It's really not too much to swallow 😅
Environment
No... I'm not talking about the weather...
Next up, we must configure our environment variables. Head over to discord.com/developers & create a new application (or use one if you already have it).
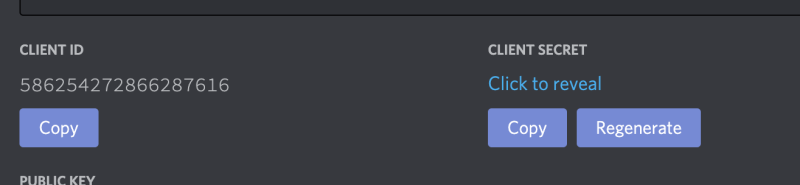
You'll want to save the CLIENT ID and CLIENT SECRET somewhere safe, as seen in the screenshot below.
After this, create a file in the root directory of your project called .env. This is where we will store our secrets (sensitive information that shouldn't be hardcoded). Add in the following content to .env:
CLIENT_ID=<the client id you copied>
CLIENT_SECRET=<the client secret you copied>
APP_URI=http://localhost:3000
JWT_SECRET=development-only-jwt-secret-value-change-me-in-prod!
COOKIE_NAME=token
Eventually, we will change APP_URI and JWT_SECRET, so don't save them anywhere for now.
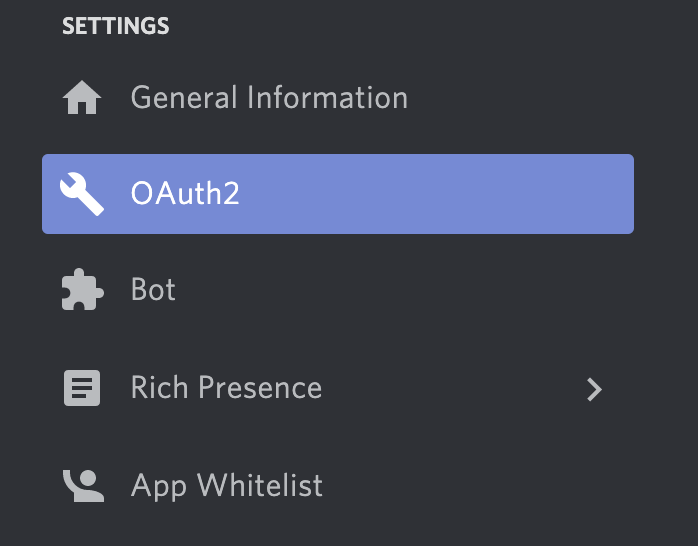
Now, if you rerun the app with yarn dev and head to localhost:3000/api/oauth you should be redirected to the OAuth URI. However, you may see an issue regarding an invalid Redirect URI. To resolve this, head to "OAuth2" under the sidebar (as seen below):
Add http://localhost:3000/api/oauth as an entry for usable Redirect URIs.

Displaying the user's details
Our last step is to display the user's details in the app. If you head to pages/index.tsx, add the following code
import { GetServerSideProps } from "next";
import { parseUser } from "../utils/parse-user";

interface DiscordUser {
  id: string;
  username: string;
  avatar: string;
  discriminator: string;
  public_flags: number;
  flags: number;
  locale: string;
  mfa_enabled: boolean;
  premium_type: number;
}

type Props = { user: DiscordUser | null };

export default function Index(props: Props) {
  if (!props.user) {
    return <p>You are being redirected.</p>;
  }

  return (
    <h1>
      Hey, {props.user.username}#{props.user.discriminator}
    </h1>
  );
}

export const getServerSideProps: GetServerSideProps<Props> = async function (
  ctx
) {
  // Use our parseUser function (defined in the next steps)
  const user = parseUser(ctx);

  // If the user is null, return 307 (redirect)
  if (!user) {
    ctx.res.statusCode = 307;
    // ...to the /api/oauth endpoint
    ctx.res.setHeader("Location", "/api/oauth");
    // ...and end the request early
    ctx.res.end();
  }

  // return our props of a nullish user
  return { props: { user } };
};
...and create a file under a new directory called utils with the name of parse-user.ts. Add the following code:
import { GetServerSidePropsContext } from "next";
import { parse } from "cookie";
import { verify } from "jsonwebtoken";

// Get our environment variables
const { JWT_SECRET, COOKIE_NAME } = process.env;

interface DiscordUser {
  id: string;
  username: string;
  avatar: string;
  discriminator: string;
  public_flags: number;
  flags: number;
  locale: string;
  mfa_enabled: boolean;
  premium_type: number;
}

export function parseUser(ctx: GetServerSidePropsContext): DiscordUser | null {
  // Check if the cookie exists, if not return null
  if (!ctx.req.headers.cookie) {
    return null;
  }

  // Parse the token from headers
  const token = parse(ctx.req.headers.cookie)[COOKIE_NAME!];

  // If there is no token, return null
  if (!token) {
    return null;
  }

  // Try parsing the JWT (this can throw errors, hence the try/catch block)
  try {
    const { iat, exp, ...user } = verify(token, JWT_SECRET!) as DiscordUser & {
      iat: number;
      exp: number;
    };

    // Return the user
    return user;
  } catch (e) {
    // Something went wrong. Likely being an invalid signature sent by the client
    return null;
  }
}
Almost there
Our last thing to do is to deploy our app to vercel. Firstly, ensure that you have vercel CLI installed
yarn global add vercel
vercel login
After this, run git init to ensure that you have initiated a local git repository here. Create a repo on GitHub and then run
git remote add origin https://github.com/username/repo-name
To connect the repo to your GitHub remote.
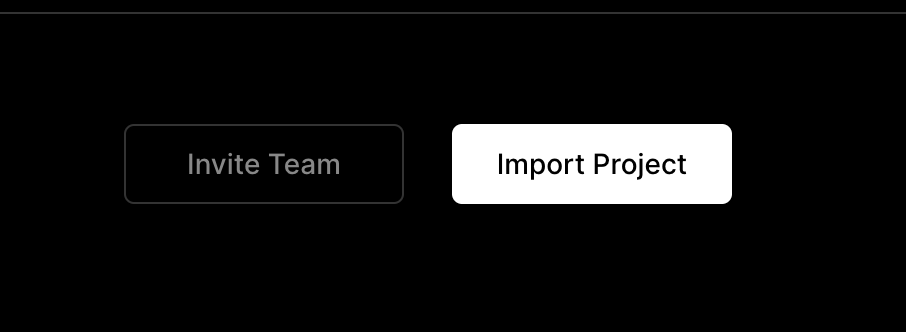
Lastly, we need to deploy the app on Vercel. Open the Vercel dashboard and hit "import project"
Choose "Import Git Repository" and enter the URL of the repo you just made on GitHub. Next, under environment settings, you need to add the same variables we defined in our local .env. However, you must set JWT_SECRET to a cryptographically secure, randomly generated string. I would recommend this website as a good start.
Hey! What about APP_URI?!
Great question! Since this is our production deployment and we are not running on localhost, we must set this to the URL that our app will be readily available on. If your project name is my-new-app, for example, then APP_URI could be https://my-new-app.vercel.app. If you are using a custom domain, then it would be that domain (with https).
Finally, with this all together, you can run your app and do the full OAuth flow. If you have any questions, pm me on discord alistair#9999 or email me at hey@alistair.cloud. I'll try and reply as quickly as possible.
Next steps
- Extract
DiscordUserto a seperate file calledtypes.ts(underutilwould make sense), so we are not repeating ourselves (this is done in the repo). - Make coffee.
If this article helped you, please star the repo – it really helps me out!
Merry Christmas, Alistair x